How to Use a Sleeping Pad
To use a sleeping pad effectively, you’ll first select the appropriate R-value for your conditions—R-2 for summer, R-4+ for winter. Clear your campsite of debris, deploy a ground cloth, then inflate your pad to one-third capacity for ideal body contouring. Side sleepers need less inflation than back sleepers for proper pressure point relief. Clean your pad with mild soap after use and store it uncompressed with valves open to maintain insulation properties and prevent mold growth, ensuring years of reliable performance through proper setup techniques.
We are supported by our audience. When you purchase through links on our site, we may earn an affiliate commission, at no extra cost for you. Learn more. Last update on 28th December 2025 / Images from Amazon Product Advertising API.
Notable Insights
- Choose the right sleeping pad type and R-value for your conditions (R-2 for summer, R-4+ for winter).
- Clear the ground of debris, lay a ground cloth, and ensure level placement within your tent.
- Inflate the pad to one-third capacity before placing your sleeping bag for optimal comfort and support.
- Adjust inflation based on sleeping position: less for side sleepers, more firmness for back sleepers.
- Store pads dry and uncompressed between trips to maintain insulation properties and prevent damage.
Selecting the Best Sleeping Pad for Your Needs
When selecting a sleeping pad for outdoor activities, you’ll encounter three main categories that each serve different purposes and priorities.
Air pads offer superior comfort and pack down to water-bottle size, weighing as little as 8-14 oz.
Self-inflating foam pads balance comfort with reliability, requiring minimal setup.
Closed-cell foam pads provide maximum durability but sacrifice comfort.
Understanding pad types helps narrow your choices, but comfort factors determine your final selection.
Knowing your gear categories gets you halfway there, but personal comfort needs seal the deal on your perfect pad choice.
R-value measures thermal resistance—you’ll need R-2 for summer, R-4+ for winter conditions.
Side sleepers require 3-inch thick pads for proper spinal alignment.
Weight matters for backpacking: ultralight options under 15 oz. excel for long-distance hiking, while car camping allows heavier, more comfortable models. Many budget sleeping pads feature built-in pumps that eliminate the need for external inflation equipment. Premium ultralight pads often provide the best warmth-to-weight ratio for serious backpackers.
Consider your sleeping position, trip duration, and environmental conditions when making your decision. Movement on air pads can create noise levels that may disrupt sleep quality throughout the night.
Preparing Your Sleeping Pad Before the Trip
Proper preparation transforms your sleeping pad from potential gear failure into reliable backcountry comfort.
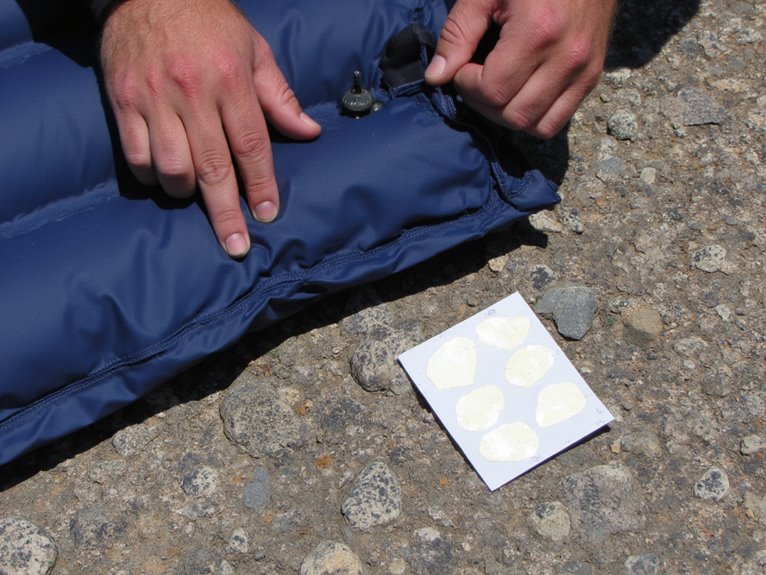
Begin with thorough inspection: inflate fully and listen for hissing sounds around seams and valves. Apply soapy water solution to reveal pinhole leaks through bubble formation. Test valve operation for proper sealing mechanisms.
Implement effective cleaning methods using mild detergent and warm water for inflatable models. Wipe foam pads with damp cloth to remove debris. Allow complete drying to prevent mold development during storage.
Master proper padding techniques by practicing setup procedures at home. Verify compatibility with your tent’s floor dimensions and sleeping bag width. Roll according to manufacturer specifications to maintain structural integrity. Select lightweight gear if you plan to carry your sleeping pad for backpacking trips.
Pack repair kits matching your pad’s material composition for field emergencies. Most pads constructed from durable 40D-50D nylon with TPU coating provide enhanced protection against outdoor wear and tear. Consider borrowing or renting sleeping pads if you’re new to camping to test different styles before making a purchase.
Setting Up Your Sleeping Pad at Camp
Your campsite selection directly impacts sleeping pad performance and longevity throughout the night.
Ground preparation requires removing rocks, twigs, and debris that can puncture or damage your pad’s fabric. Clear a flat area measuring at least two feet wider than your pad dimensions.
Proper ground clearing prevents costly pad damage—remove all sharp objects and debris from an area twice your pad’s width.
Tent placement should prioritize level ground with minimal slope—ideally less than 5-degree incline. Deploy a footprint or ground cloth beneath your pad to prevent moisture transfer and abrasion damage. This protective layer extends pad lifespan considerably.
Position your sleeping pad on firm, compact soil rather than loose sand or gravel. Unroll the pad completely before inflation to prevent fabric stress. For maximum durability, ensure your sleeping pad features 40D-50D nylon construction with TPU coating to resist tearing and provide waterproofing.
Check for proper alignment within your tent’s sleeping area, ensuring adequate clearance from tent walls to prevent condensation contact during temperature fluctuations. The sleeping pad provides essential insulation barriers that prevent the cold ground from pulling warmth away from your body. Inflate your pad before placing your sleeping bag on top to ensure proper setup and optimal comfort.
Maintaining and Repairing Your Sleeping Pad
Regular maintenance extends your sleeping pad’s lifespan from a few seasons to several years of reliable backcountry service.
Clean your pad with mild soap and lukewarm water, avoiding detergents that degrade materials. Keep valves closed during cleaning to prevent water ingress and internal damage. Remove insect repellent immediately if spilled, particularly DEET to prevent damage.
Essential maintenance tips include:
- Store uncompressed – Keep your pad flat or loosely rolled with valves open to preserve insulation quality.
- Manage moisture – Use pump sacks during inflation and air-dry completely between trips to prevent mold growth.
- Inspect regularly – Check for wear patterns and valve function before each outing.
Master basic repair techniques by carrying patches and appropriate adhesive. Locate leaks using the tub test method by submerging your inflated pad in water and watching for escaping air bubbles. Quality sleeping pads constructed from 40D nylon materials offer superior tear resistance and puncture-proof performance for long-lasting durability.
Apply glue along tears and back with patches for maximum strength. Address small punctures immediately to prevent expanding damage during use.
Safety Guidelines for Sleeping Pad Use
While sleeping pads provide essential comfort and insulation, improper use can lead to serious safety risks including hypothermia, injury from falls, and equipment failure in critical situations.
Pad safety begins with proper R-value selection. Choose pads with R-values above 2.0 for cooler conditions to prevent dangerous heat loss. Match your pad’s insulation rating with your sleeping bag’s temperature specifications. This creates an effective sleep system that prevents hypothermia during overnight stays.
Setup location directly affects safety outcomes. Clear your sleeping area of rocks, sticks, and debris that could puncture the pad. Place it on firm, flat surfaces away from fire pits and direct sunlight to prevent material damage. Use a ground sheet or foam pad underneath your sleeping pad for additional protection from sharp objects and moisture.
For child safety, use firm surfaces with well-fitted pads designed for younger users. Place infants on their backs without loose bedding or toys near the sleeping area. Avoid placing sleeping pads on couches or armchairs as these surfaces do not provide the stable, safe sleep environment that infants require.
Side sleepers require adequate thickness of at least 3 to 5 inches to prevent pressure points and maintain proper spinal alignment during sleep.
Proper Storage and Transportation Methods
Three critical factors determine your sleeping pad’s lifespan: moisture control, temperature management, and proper handling techniques.
Proper storage begins with complete moisture elimination. You’ll prevent mold and material degradation by ensuring your pad is thoroughly dry before storage.
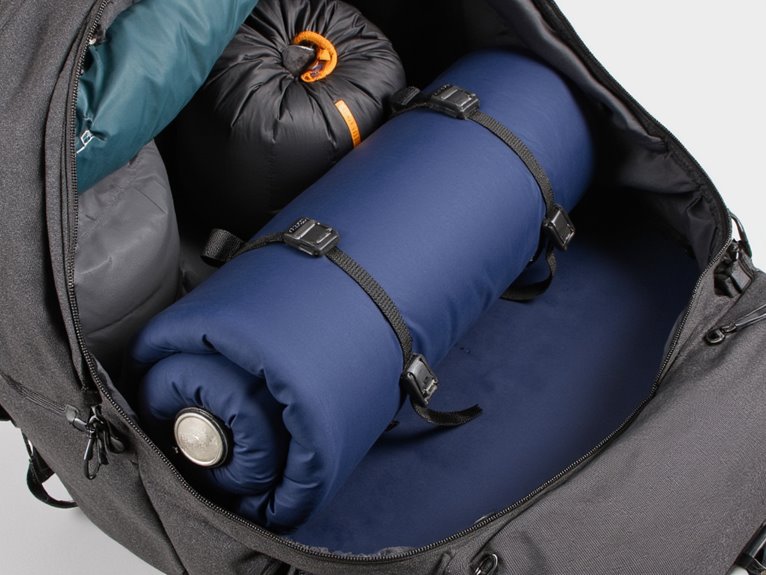
Transportation techniques require specific protocols for different pad types:
- Self-inflating foam pads – Store semi-inflated with valves open for air circulation and foam memory retention.
- Air pads and inflatables – Roll loosely rather than folding to prevent crease formation and insulation damage.
- All pad types – Maintain storage temperatures between 32-75°F in dry environments away from direct sunlight.
Use designated storage sacks during transport. Avoid tight compression for extended periods.
Store pads flat when possible, or loosely rolled to preserve insulation properties and valve integrity.
Maximizing Comfort and Performance

Beyond proper setup and storage, achieving ideal comfort from your sleeping pad requires understanding the relationship between pad type, inflation level, and your specific sleep patterns. Proper inflation techniques greatly impact comfort and support.
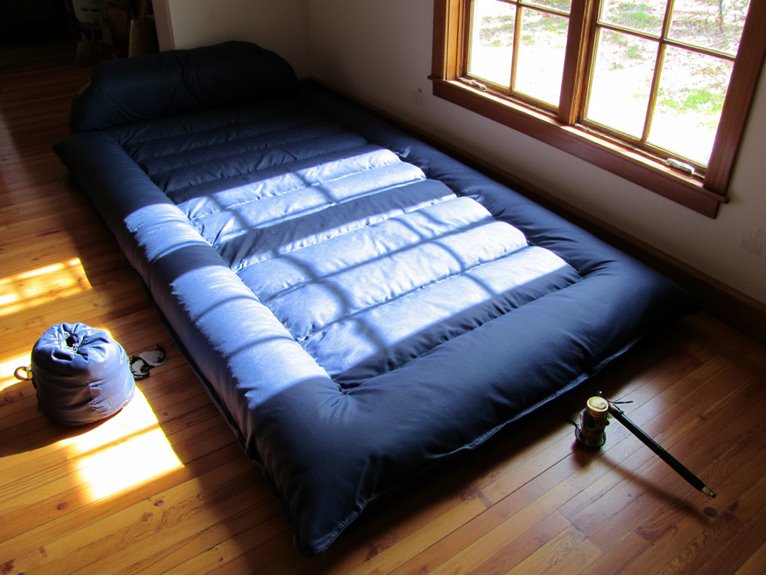
Over-inflation creates a trampoline-like surface that reduces body contouring and causes pressure points on hips and shoulders. Inflate to approximately one-third capacity for best body conformity. Side sleepers need less inflation for proper contouring, while back sleepers require slightly more firmness.
Pad materials directly affect performance characteristics. Air pads offer lightweight portability but varying durability. Self-inflating pads balance comfort with moderate pack size. Closed-cell foam pads excel in durability and consistent insulation.
Consider R-value ratings for thermal performance—higher values provide better ground insulation in cold conditions.
Frequently Asked Questions
Can I Use a Sleeping Pad on Snow or Frozen Ground?
You can definitely use a sleeping pad on snow or frozen ground.
Snow’s insulation properties make it warmer than rock or dirt surfaces since snow’s a poor heat conductor. However, you’ll need adequate frost protection with an R-value of at least 5 for winter conditions.
Consider layering pads to boost insulation effectiveness. The pad creates an essential barrier between your body and the cold surface beneath.
How Do I Prevent My Sleeping Pad From Sliding Around at Night?
You’ll prevent sleeping pad sliding by applying silicone strips or seam sealer dots to the pad’s underside for better sleeping pad traction.
Anti-slip tape works effectively on nylon tent floors.
Install sleeping pad slide stoppers with shock cords around shoulder and hip areas.
These camping gear tips include using cord locks for secure tension adjustment.
On inclined surfaces, double your securing methods.
Dyneema tent floors naturally grip pads better than standard nylon materials.
What’s the Difference Between R-Value and Temperature Ratings for Sleeping Pads?
R-value provides standardized, scientific measurement of insulation effectiveness using ASTM testing protocols.
Temperature ratings offer subjective comfort estimates without universal standards.
R value factors include material thickness and thermal resistance, while temperature impacts depend on manufacturer claims rather than consistent testing.
You’ll get reliable performance data from R-values across all brands, but temperature ratings vary considerably between companies and aren’t additive like R-values.
Can Sleeping Pads Be Used With Hammocks or Only Ground Camping?
You can use sleeping pads with both hammocks and ground camping.
Hammock compatibility depends on proper fit and design features. Hammock-specific pads offer better non-slip surfaces and curved shapes that match hammock contours. They typically provide superior insulation benefits with higher R-values to combat airflow beneath hammocks.
Standard ground pads work too if they fit snugly, though they may shift during sleep and offer less ideal performance.
How Often Should I Replace My Sleeping Pad?
Your sleeping pad lifespan depends on type and usage frequency.
Foam pads typically last 3-5 years, while air pads need replacement every 2-4 years.
Watch for signs replacement is needed: loss of inflation retention, reduced cushioning, visible deformation, or decreased R-value.
Heavy use accelerates wear considerably.
Inspect regularly for damage and track performance changes after each trip to determine ideal replacement timing.
On a final note
You’ve now mastered every aspect of sleeping pad use. Proper selection, setup, and maintenance will guarantee years of comfortable backcountry sleep. Your pad’s R-value determines insulation performance, while correct inflation prevents damage and maximizes comfort. Regular inspection catches small issues before they become trip-ending failures. Follow manufacturer guidelines for storage temperatures and folding patterns. With these techniques, you’ll maintain ideal thermal efficiency and extend your pad’s lifespan considerably.