How to Resole Your Hiking Boots: Extending Life on the Trail
You’ll know your hiking boots need resoling when tread depth diminishes considerably, outsoles separate from uppers, or you experience persistent foot discomfort after 900-1000 miles of use. Start by thoroughly cleaning boots and evaluating structural damage, then gather essential materials like Barge Cement, 120-grit sandpaper, and replacement Vibram soles. Professional resoling costs $80-150 with warranties, while DIY requires careful surface preparation, proper adhesive application, and 8-24 hour curing times for best results. Understanding these fundamentals guarantees you’ll maximize your investment in quality footwear.
We are supported by our audience. When you purchase through links on our site, we may earn an affiliate commission, at no extra cost for you. Learn more. Last update on 28th January 2026 / Images from Amazon Product Advertising API.
Notable Insights
- Replace soles when tread loss reduces grip, water enters boots, or after 900-1000 miles of use.
- Clean boots thoroughly, assess structural damage, and sand bonding surfaces before starting the resoling process.
- Use Barge Cement or polyurethane adhesives with clamps, sandpaper, and alcohol for proper sole attachment.
- Apply adhesive evenly to both surfaces, clamp for 8-24 hours, and avoid wearing until completely cured.
- Professional resoling costs $80-150 but offers warranties, while DIY saves money but requires skill.
Signs Your Hiking Boots Need Resoling
Like a warning light on your dashboard, worn hiking boots send clear signals when they’re approaching the end of their functional life.
Significant tread loss creates a bald tire effect, eliminating grip on wet rocks and loose terrain. When lugs flatten or disappear completely, you’ll notice frequent slipping during ascents and descents.
When hiking boot treads wear smooth like bald tires, expect dangerous slipping on wet rocks and steep terrain.
Structural damage becomes evident through outsole separation from the midsole or visible cracks in either component. Compressed midsoles lose shock absorption and rebound capabilities.
Water ingress despite reproofing indicates membrane failure-a critical issue for trail performance.
Comfort degradation signals advanced wear: persistent foot pain, collapsed heel collars, or flattened insoles. Regular inspection for these signs helps you catch problems early and determine whether resoling is a viable option.
Rocky terrains and marshy conditions accelerate boot deterioration compared to softer trail surfaces.
Understanding your boot lifespan helps determine whether resoling techniques can restore performance or if replacement becomes necessary. Quality boots typically provide around 900-1000 miles of use before requiring significant maintenance or replacement.
Professional assessment guarantees top-notch trail safety.
Preparing Your Boots for the Resoling Process
Before you can successfully attach a new sole to your hiking boots, you’ll need to complete three critical preparation phases that determine the quality and longevity of your repair.
These essential steps include thorough cleaning to remove all contaminants, extensive damage assessment to identify structural issues, and precise surface preparation to guarantee the best adhesive bonding. During the assessment phase, perform a midsole crumble test by gently pressing the midsole material to check if it breaks off easily, which would indicate irreparable damage.
Proper execution of each phase creates the foundation for a professional-grade resoling job that’ll withstand thousands of miles on the trail. Professional resoling services often use heat activation techniques to ensure the strongest possible bond between the new sole and boot upper. Quality hiking boots with stitched construction are typically the best candidates for resoling, as this method provides superior durability compared to glued-only assemblies.
Thorough Cleaning Requirements
When your hiking boots accumulate months of trail dirt, mud, and grime, proper cleaning becomes the critical foundation for successful resoling. Remove all visible debris first. Knock off dried dirt, pull out laces and insoles completely. Use soft-bristled brushes for general cleaning and toothbrushes for detailed work around eyelets and seams.
| Cleaning Agent | Application Method | Drying Time |
|---|---|---|
| Specialized boot cleaner | Circular motions with soft cloth | 24-48 hours |
| Mild dishwashing soap | Diluted in warm water | 24-48 hours |
| Vinegar solution (20%) | Applied for stubborn stains | 24-48 hours |
| Saddle soap | Work into leather thoroughly | 24-48 hours |
| Water rinse only | Remove all soap residues | 12-24 hours |
Following proper boot maintenance tips prevents resoling failures. Allow boots to dry completely after cleaning to prevent material damage and ensure proper adhesion during the resoling process. Avoid cleaning myths about using harsh detergents. When wiping the exterior with a damp cloth, avoid excessive moisture which can compromise the leather integrity needed for resoling.
Damage Assessment Process
Once your boots are thoroughly clean and dry, you’ll need to conduct a systematic damage assessment to determine whether resoling is feasible and cost-effective.
Start with structural integrity checks focusing on key damage indicators. Inspect uppers for brittleness, large tears, or separation from the sole. Perform the midsole crumble test by attempting to break off pieces with your fingers-significant crumbling means the boots are beyond repair.
Your assessment checklist should include examining the heel counter for compromised ankle support and checking welt condition for excessive wear or deep cracks.
Look for deep cracks at flex points and holes near eyestays, as recrafting pressure can worsen these areas. Remember that not all boot categories are suitable for this service, as adhesive pinched construction determines eligibility for the resoling process.
Check that your boots are made from tear-resistant polyester or similar durable materials, as these materials typically withstand the resoling process better than inferior fabrics.
Finally, evaluate sole separation-boots with more than 50% perimeter separation typically aren’t repairable. Remember that stitched soles are generally the best candidates for successful resoling compared to primarily glued constructions.
Surface Preparation Steps
Proper surface preparation forms the foundation of successful boot resoling, requiring systematic attention to five critical steps that determine adhesive bond strength and long-term durability.
Surface prepping begins with thorough cleaning and dirt removal. Remove laces completely to access all boot areas. Use a stiff brush to dislodge debris from treads and seams, then wipe with a damp cloth. Apply specialized leather cleaner for stubborn dirt using circular motions. Use masking tape to protect areas around the sole attachment points that don’t require adhesive application.
Your adhesion strategies should include these essential steps:
- Disinfection – Apply rubbing alcohol where sole meets upper to eliminate oils and contaminants.
- Surface roughening – Lightly sand smooth bonding areas with emery cloth to increase surface area.
- Measurement preparation – Cut new sole material slightly oversized, then sand edges for precise fitting.
Avoid wax-based treatments on boots intended for resoling, as residue can interfere with proper bonding. Confirm all surfaces are completely clean, dry, and dust-free before adhesive application.
DIY Resoling: Tools, Materials, and Techniques
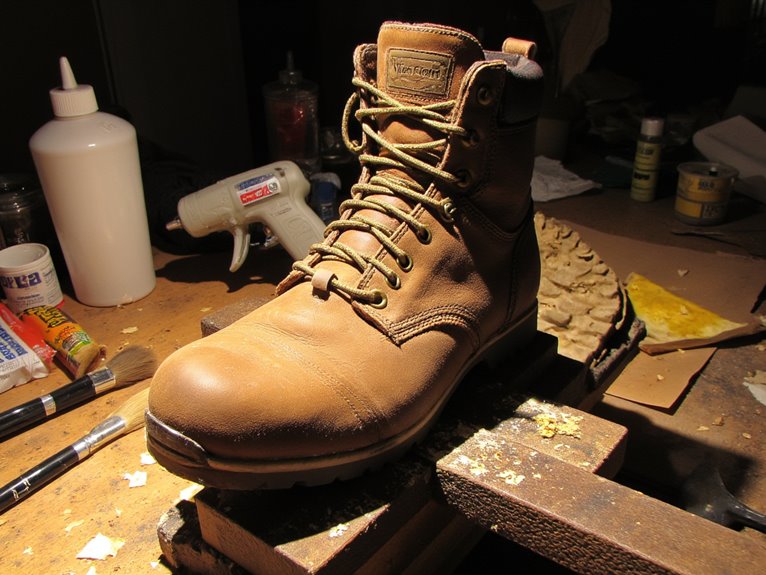
You’ll need specific tools and materials to execute a successful DIY resoling project on your hiking boots.
The process requires precision instruments like C-clamps, duct tape for curved surfaces, a millimeter-increment ruler, sharp utility knife, and replacement sole material that matches your boot’s specifications.
Understanding both the essential equipment list and the systematic resoling methodology will determine whether your repair achieves professional-grade durability or fails prematurely on the trail.
Essential Tools and Materials
While searching online tutorials might make resoling appear straightforward, gathering the right tools and materials determines whether your DIY project succeeds or ends in frustration.
Success requires specific adhesive types matched to your repair needs. Barge Cement ($12-15) provides waterproof bonds for major sole reattachment, while polyurethane adhesives offer flexibility for moving joints with 8-12 hour cure times.
Essential preparation tools include:
- C-clamps – maintain pressure during curing
- 120-grit sandpaper – roughen surfaces for ideal adhesion
- Isopropyl alcohol – removes contaminants before bonding
For sole materials, Vibram soles deliver proven durability and traction. Goodyear Neolite heels outlast originals by 2-3 times.
You’ll also need dull scrapers for removing old adhesive residue and brushes for even glue application.
When resoling boots, pay special attention to maintaining the original toe box space dimensions to ensure comfort and proper fit after the repair is complete.
Step-by-Step Resoling Process
The resoling process begins with careful removal of your boot’s worn sole, a task that requires patience and precision to avoid damaging the upper materials.
Use needle-nose pliers to extract stubborn stitches from vintage boots while preserving midsole integrity.
Clean both surfaces thoroughly, scraping away old adhesive and debris.
Sand contact areas with 120-grit sandpaper to create proper texture for bonding.
Common mistakes include applying oils before adhesion, which reduces effectiveness.
Apply polyurethane adhesive or contact cement evenly to both surfaces.
Allow adhesive to become tacky before joining.
Align the new sole carefully, avoiding gaps or overhang.
Clamp for 8-24 hours depending on adhesive specifications.
Resoling myths suggest immediate wear is acceptable-wait for complete curing.
Test fit afterward and make final adjustments.
Consider upgrading to boots with waterproof construction during your next purchase if moisture resistance becomes a priority after extending your current pair’s lifespan.
Professional Resoling Services vs. Self-Repair Options
When deciding between professional resoling and DIY repair, cost represents just one factor in a complex equation that includes skill requirements, time investment, and long-term durability.
Professional resoling costs $80-150 but delivers 95% success rates with 30-90 day warranties. DIY kits range $8.99-24.99, plus $20-50 for tools, achieving only 60-80% success rates for beginners. Your repair efficiency depends on experience level and available equipment.
Consider these key factors in your cost analysis:
- Time Investment: Professional service requires only drop-off/pickup versus 2-4 hours hands-on work plus 24-hour curing time.
- Quality Assurance: Professionals guarantee workmanship while DIY outcomes vary greatly based on skill.
- Complexity Handling: Cobblers manage full rebuilds, midsole replacements, and waterproofing beyond basic sole attachment.
For valued hiking boots requiring reliable performance, professional resoling maximizes long-term investment returns.
Benefits of Resoling Over Buying New Boots
Before discarding worn hiking boots, consider that resoling offers compelling advantages over replacement that extend far beyond simple cost savings.
The 50% rule provides clear guidance: resole when repair costs remain below half the price of equivalent new boots. High-end boots costing $200+ almost always justify resoling since repair represents a fraction of replacement cost.
Environmental benefits prove equally significant.
La Sportiva’s 2022 sustainability report demonstrates resoling generates only 6-10% of new shoe manufacturing’s environmental impact. You’ll reduce landfill waste while conserving manufacturing resources.
Your perfectly broken-in boots deliver superior comfort and performance.
Well-molded uppers provide ideal fit without weeks of painful break-in periods. New soles restore original traction and safety while preserving familiar gear characteristics you’ve learned to trust on varied terrain.
When Resoling Isn’t Possible: Alternatives and Limitations
Unfortunately, resoling isn’t always a viable option for every pair of hiking boots.
Not every hiking boot can be resoled due to construction methods, damage severity, or manufacturer limitations.
Repair limitations include boots with glued rather than stitched construction, severely damaged uppers, or brands that don’t offer resoling services.
When traditional resoling isn’t feasible, you’ll need to explore alternative solutions.
Your repair options include:
- Boot recrafting services – Complete reconstruction of multiple components including soles, stitching, and hardware for $150-250
- Professional cobbler repairs – Targeted fixes for heel and sole damage with 95% success rates, costing $10-60
- DIY repair kits – Basic sole patches and adhesive repairs for $9-25, though first-timer success rates only reach 60-80%
Professional repairs typically offer quick turnaround times, while DIY solutions require 2-4 hours plus 8-48 hour curing periods.
If your boots are beyond repair, investing in quality hiking gear like GPS devices can help you navigate safely while breaking in new footwear on familiar trails.
Frequently Asked Questions
How Many Times Can Hiking Boots Be Resoled Before Replacement?
You can typically resole quality hiking boots 2-3 times before replacement becomes necessary.
Resolving frequency depends on your boot’s upper construction quality and maintenance habits. Well-maintained boots with durable leather uppers maximize this potential.
Boot lifespan extends noticeably through proper resoling – each cycle adds 600-1000 miles of use.
However, deteriorating midsoles, cracked uppers, or compromised structural integrity will eventually limit further resoling opportunities regardless of outsole condition.
Will Resoling Affect the Waterproof Membrane in My Boots?
Resoling will likely compromise your boot’s waterproof integrity.
The interior membrane sits between the upper and sole, requiring cutting or disturbing during separation. Once breached, membrane performance can’t be restored to original specifications. You’ll lose the manufacturer’s waterproof guarantee permanently.
External treatments like wax or sprays provide water resistance afterward, but they can’t replicate the sealed membrane system that blocks moisture ingress completely.
Can I Resole Boots With Different Sole Materials Than Original?
You can resole boots with different materials, but sole compatibility depends on your boot’s construction method and attachment system.
Goodyear welted boots offer more flexibility than cemented designs. Different rubber compounds affect material durability-softer materials provide better grip but wear faster, while harder compounds last longer but reduce traction.
Consult experienced cobblers before switching materials, as mismatched soles can cause poor adhesion, altered flex patterns, and premature failure.
How Long Should I Wait Between Resoling Jobs on Boots?
Your resoling frequency depends entirely on usage patterns and terrain exposure.
Moderate hikers typically resole every 1-3 years, while aggressive trail users need service every 6-12 months.
Monitor sole longevity through regular tread inspections-significant wear patterns or thinning indicate it’s time.
You can’t predict exact intervals since individual hiking habits vary dramatically.
Professional assessment determines ideal timing better than arbitrary schedules.
Do Resoled Boots Require a Break-In Period Like New Ones?
Resoled boots typically require less break-in than new ones since your upper’s already molded to your foot.
However, you’ll still need adaptation time if the cobbler changes sole stiffness or profile.
Follow standard break-in tips: wear them indoors first, then progress to short walks before longer hikes.
Most hikers report improved boot comfort within days rather than weeks, unlike completely new footwear requiring months.
On a final note
You’ve now got the knowledge to extend your boots’ lifespan greatly. Resoling costs $50-80 versus $150-300 for new boots. Quality leather uppers can handle 2-3 resoles over their lifetime. Check your sole wear every 200-300 miles of hiking. Don’t wait until the midsole’s compromised-that’s when resoling becomes impossible. Professional services offer 6-month warranties on their work. Your wallet and the environment will thank you for choosing repair over replacement.