Gear Failures on the Trail: Emergency Repairs and Workarounds
When your gear fails on the trail, you’ll need immediate solutions to stay safe and continue your hike. Duct tape fixes most emergencies-wrap it around broken tent poles, seal sleeping pad leaks, and temporarily reattach boot soles. Pack a basic sewing kit with polyester thread and curved needles for fabric repairs on backpacks and tents. Use zip ties to replace broken buckles and secure damaged components. Since gear failures occur most often during storms and harsh conditions, knowing these techniques becomes critical for preventing minor problems from escalating into dangerous situations that could compromise your entire expedition.
We are supported by our audience. When you purchase through links on our site, we may earn an affiliate commission, at no extra cost for you. Learn more. Last update on 28th January 2026 / Images from Amazon Product Advertising API.
Notable Insights
- Carry duct tape, zip ties, and paracord for quick fixes of broken poles, torn fabric, and failed buckles.
- Use repair tape and basic stitching techniques to patch tent tears and sleeping pad leaks immediately.
- Replace broken buckles with zip ties and secure damaged zippers with tape or cordage wrapping.
- Match fabric types when patching: use nylon patches on nylon gear and polyester on polyester materials.
- Pack a trail repair kit with needle, thread, adhesive patches, and multi-tool distributed among group members.
Most Common Equipment Breakdowns Hikers Face
Equipment failures strike even the most prepared hikers, turning what should be reliable gear into potential safety hazards on the trail.
Even meticulously maintained gear can transform from trusted companion to dangerous liability when mechanical failures occur in remote wilderness settings.
You’ll encounter common breakdowns across five critical categories that consistently plague outdoor enthusiasts.
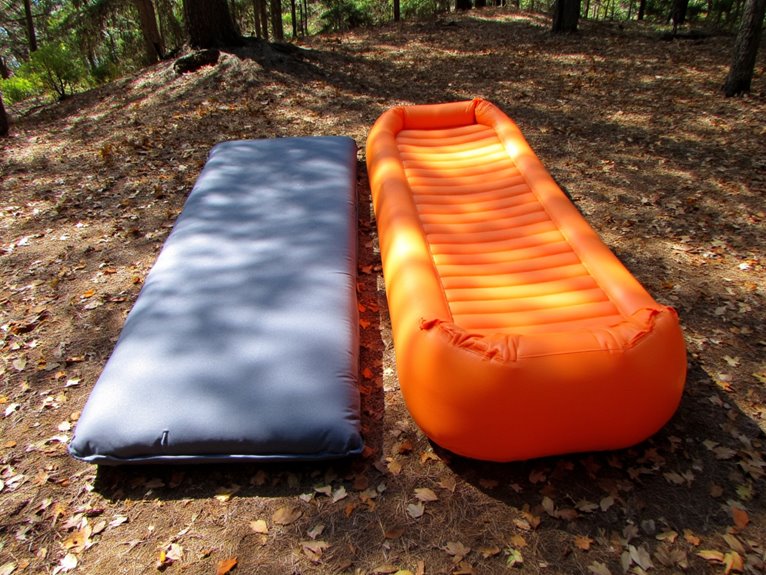
Sleeping gear represents your most vulnerable equipment. Sleeping pads develop leaks from multiple puncture points, while tent zippers jam under field conditions.
Your sleeping bag’s zipper often fails when you need insulation most.
Backpack failures center on structural weak points: shoulder strap attachment tears, zipper splits, and buckle breaks that compromise load distribution.
Water systems fail through filter hose tears and pump O-ring degradation.
Footwear experiences sole separation and upper tears.
Essential small gear like trekking poles snap at joints, while stoves malfunction due to fuel contamination.
These equipment weaknesses demand immediate field solutions to prevent trip-ending disasters.
Having backup instant tents that deploy in 60 seconds can provide emergency shelter when your primary tent fails unexpectedly on the trail.
Why Gear Fails When You Need It Most
You’ll notice that gear failures rarely happen during easy day hikes or perfect weather conditions.
Instead, your equipment breaks when you’re already dealing with storms, difficult terrain, or emergency situations where you need it most.
This isn’t just bad luck-it’s Murphy’s Law in action, where the combination of environmental stress and high-stakes conditions pushes weakened gear components past their breaking point precisely when failure creates the greatest consequences.
Common failure points include zipper durability issues on backpacks and hydration systems that develop leaks after extended use in harsh conditions.
Murphy’s Law Effect
When harsh conditions converge with critical moments on the trail, gear failure rates spike dramatically-a phenomenon that perfectly embodies Murphy’s Law in the wilderness.
Your equipment tends to malfunction precisely when you need it most: during storms, injuries, or navigation emergencies.
Statistics show gear failures contribute to 5% of cases where hikers become lost. The underlying mechanism involves stress amplification-adverse weather introduces moisture and debris while physical impacts from falls damage internal components.
Your GPS fails when visibility drops. Tent poles snap during sudden wind gusts. Water filters clog exactly when you’re dehydrated.
Stress compounds these failures through hurried handling and cognitive overload. Fatigue reduces your fine motor control, making field repairs nearly impossible.
Hiking shoes face similar vulnerability, with stitched construction proving more reliable than glued assemblies when subjected to the repeated stress of 900-1000 mile journeys across varied terrain.
Proper gear reliability depends on consistent maintenance and robust emergency preparedness protocols before problems cascade beyond recovery.
Stress Amplifies Weaknesses
Beyond the random timing of Murphy’s Law lies a more predictable pattern: stress systematically targets your gear’s weakest points. Material weakness becomes critical when you’re fighting wind gusts at 11,000 feet elevation. That microscopic tear in your tent’s rainfly suddenly expands under repeated stress cycles from flapping fabric.
Environmental impact accelerates this degradation process. Cold temperatures reduce nylon’s tensile strength by 15-20%, making your pack straps vulnerable precisely when you’re hauling maximum weight through challenging terrain. UV exposure weakens polymer bonds in critical components like buckles and zippers.
Stress concentrations develop at attachment points where forces multiply. Your sleeping bag’s zipper fails during a storm because repeated loading exceeded its 50-pound test rating.
Cold conditions also compromise your hand dexterity when you need it most, as reduced blood circulation impairs your ability to perform delicate repair tasks on critical gear.
Understanding these failure patterns helps you identify vulnerable components before they become trail emergencies.
Quick Emergency Fixes Using Duct Tape
Although duct tape can’t solve every gear malfunction, it serves as one of the most versatile emergency repair tools you can carry on the trail.
Duct tape ranks among the most essential multipurpose repair tools for any serious hiker’s emergency kit.
The duct tape versatility extends to patching waterproof fabrics, sealing punctured sleeping pads, and stabilizing broken tent poles. Emergency adhesive uses include holding loose boot soles and temporarily repairing cracked water bottles.
Carry approximately two feet on long thru-hikes, wrapped around hiking poles to save space. Small rolls measuring two inches wide by fifty inches long fit easily in repair kits.
However, duct tape provides only temporary fixes and performs poorly on thin nylon fabrics. Replace tape rolls yearly to maintain adhesive effectiveness. Complement with repair patches, cord, and needles for all-encompassing solutions.
When dealing with wet conditions, duct tape can also temporarily patch moisture-wicking sock holes until you can access proper merino wool replacements at your next resupply point.
Sewing and Fabric Repair Techniques
When duct tape can’t handle the job, proper sewing techniques become your best defense against fabric failures in the backcountry.
You’ll need a well-stocked repair kit containing strong synthetic thread, curved needles, and fabric-specific patches to tackle everything from torn rain jackets to ripped pack seams.
Understanding basic stitching methods and how different outdoor fabrics respond to repairs will determine whether your gear lasts another day or forces an early exit from the trail.
Just as water filters require backflushing maintenance to preserve their effectiveness during extended trips, your gear repairs need proper maintenance techniques to ensure long-term reliability in demanding outdoor conditions.
Essential Sewing Kit Items
Five essential components form the backbone of any effective trail sewing kit: high-quality thread, appropriate needles, basic hardware, protective storage, and repair tape backup.
Thread durability determines repair longevity. Kevlar thread offers 125-pound breaking strength, while nylon and polyester resist moisture and UV damage. Carry 60–75 feet for thorough field repairs.
Needle types must match fabric weights. Stainless steel hook-shaped needles penetrate thick webbing, while heavy-duty sewing machine needles handle pack straps and tent materials.
| Component | Primary Use | Weight Consideration |
|---|---|---|
| Kevlar Thread | High-stress repairs | 60-75 feet recommended |
| Hook Needle | Thick fabrics/webbing | Compact storage essential |
| Safety Pins | Temporary fixes | Immediate hold capability |
Essential hardware includes safety pins, buttons, and wire for quick fixes. Store everything in a waterproof case weighing under 0.5 ounces. Repair tape provides instant patches where sewing isn’t practical. When working with modern tent materials, focus repairs on 20D nylon or 210T polyester fabrics which commonly feature waterproof coatings that require careful stitching to maintain weather protection.
Basic Field Stitching Methods
Having your sewing kit ready means nothing without mastering the fundamental stitching techniques that’ll hold your gear together when it matters most. Field stitching demands precision and the right approach for each repair type.
Start with proper thread preparation. Cut thread at an angle and measure 2.5 times your repair length to prevent tangling. Wet your fingers to control frays during needle threading. Secure with a double overhand knot-never tie thread directly to the needle.
Essential field stitching techniques for emergency repairs include:
- Running stitch – Simple in-and-out for closing small tears
- Backstitch – Creates strong, durable seams by stitching backward
- Whip stitch – Loops around fabric edges for joining pieces
- Blanket stitch – Reinforces torn edges against fraying
- Overcast stitch – Provides tight edge protection
Use polyester thread and #4 embroidery needles for ideal weather resistance and fabric penetration. Just as you’d change hiking socks every 24 hours during multi-day hikes to prevent moisture problems, regularly inspect your stitched repairs to ensure they maintain integrity throughout your journey.
Fabric Types and Repairs
Why does your tent rip along the seam while your backpack’s bottom remains intact after months of abuse?
The answer lies in fabric durability and construction differences. Your tent likely uses lightweight 20D ripstop nylon, prioritizing weight savings over ruggedness. Your pack’s bottom features heavy-duty 500D polyester, engineered for abrasion resistance.
Understanding fabric types helps you choose appropriate repair techniques.
Polyester offers excellent UV resistance and environmental stability, making it ideal for patches on sun-exposed gear. Nylon provides superior strength-to-weight ratios but requires UV protection. Dyneema delivers ultralight performance with exceptional tear resistance.
For repairs, match materials when possible.
Use nylon ripstop patches on nylon gear, polyester on polyester equipment. Heat-sealing works on thermoplastic-coated fabrics. Specialty adhesive tapes like Tenacious Tape provide waterproof field repairs. When working with fleece layers in your gear system, look for materials with weight over 200 grams per square meter for optimal thermal performance and reduced vulnerability to tears.
Creative Solutions When Replacement Isn’t Possible
When you’re miles from civilization and critical gear fails, improvised repairs become your lifeline to completing the journey safely. Creative repairs using available materials can restore functionality when replacement isn’t an option.
Makeshift solutions often exceed temporary expectations, providing reliable performance for trip completion.
Essential creative repair techniques include:
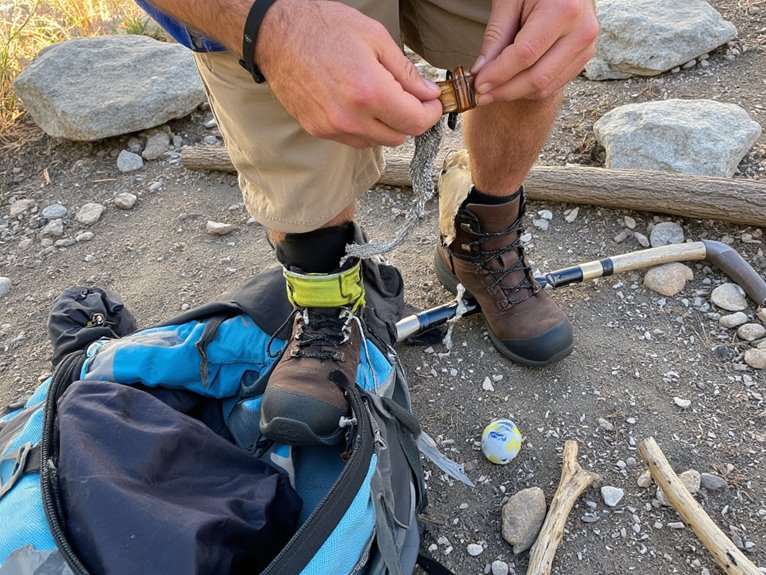
- Wrapping duct tape around broken poles with reinforcing sticks for structural stability
- Using zip ties to replace snapped buckles and secure damaged components
- Creating external gear carriers with nylon cord to isolate wet items
- Manually closing broken zippers and sealing with tape or cordage
- Combining adhesive patches with needle-and-thread reinforcement for durable fixes
Multi-tools enable precise cutting and manipulation of repair materials.
Carry essential components including duct tape, patches, cord, and needle-thread combinations for thorough field repair capabilities. When water purification systems fail, Aquatabs Water Purification Tablets serve as reliable backup options, with each 397mg tablet treating four gallons in 30 minutes while maintaining a neutral taste.
How Equipment Failures Impact Your Safety and Success
While field repairs can restore functionality to damaged equipment, the underlying risks of gear failure extend far beyond simple inconvenience. Falls cause 68% of mountaineering accidents, with 45% proving fatal. Your safety awareness becomes critical when considering that ankle injuries comprise 40% of hiking accidents, often from faulty footwear.
Equipment failures force increased exertion and mental strain. Broken trekking poles or torn pack straps shift stress to your body, accelerating fatigue. This compromised state impairs your risk assessment abilities, contributing to the 6% of emergency situations involving fatigue-related symptoms.
Failed gear compounds emergency scenarios by hindering communication devices and limiting mobility. Broken survival equipment transforms minor issues into life-threatening situations. Your psychological state deteriorates under equipment stress, affecting decision-making when precision matters most.
Ill-fitting hiking boots compound these risks by causing blister formation through increased friction and pressure points, potentially forcing hikers to abandon their trek or continue in compromised conditions.
Building an Effective Trail Repair Kit
The difference between a manageable equipment failure and a potentially dangerous situation often comes down to having the right repair materials within arm’s reach. Your trail repair kit needs essential repair items that address common failures without adding unnecessary weight.
Essential repair materials within reach transform equipment failures from dangerous emergencies into manageable trail inconveniences.
Duct tape wrapped around trekking poles provides instant access. A quality multi-tool delivers pliers, knives, and screwdrivers in one compact package.
Effective packing techniques maximize your kit’s utility:
- Store 50 feet of paracord for gear lashing and tent repairs
- Pack assorted zip ties for quick structural fixes
- Include tent pole repair sleeves to maintain shelter integrity
- Carry adhesive patches for fabric repairs without residue
- Add needle and thread for durable stitching solutions
Organize components by function and distribute weight among group members when possible. Additionally, consider including water purification tablets as a backup method since water filtration systems can fail when you need them most.
Prevention Through Proper Gear Maintenance
Although gear failures often seem sudden and unexpected on the trail, most equipment breakdowns result from poor maintenance practices that gradually weaken materials over time.
Preventive maintenance greatly extends gear longevity through systematic care protocols. Clean equipment thoroughly after each use with mild soap and specialty cleaners designed for technical fabrics. Air dry completely before storage to prevent mildew and material breakdown.
Inspect gear regularly for frayed straps, damaged zippers, bent poles, and punctures. Repair small tears and loose seams immediately to prevent catastrophic failures.
Store gear properly in cool, dry locations away from UV light. Don’t compress sleeping bags during storage-this destroys insulation loft. Use sleeping bag liners to reduce washing frequency.
Treat footwear with appropriate conditioners to maintain waterproofing and flexibility. Pay special attention to running shoes, which typically need replacement every 3-6 months with regular use due to cushioning breakdown and outsole wear.
Adapting Your Plans When Gear Fails
Despite your best maintenance efforts, gear failures still occur on the trail and demand immediate tactical responses to keep you safe and mobile.
Effective gear adaptation strategies require systematic evaluation of your equipment’s current capabilities. Assess each item’s functional status through visual and tactile inspection. Prioritize repairs that restore essential functions like shelter integrity and footwear stability.
Your trail plan adjustments must reflect reduced gear reliability. Modify hiking distances and pace to accommodate compromised equipment performance. Reroute around challenging terrain that exceeds your current gear’s capabilities.
When sleeping bag failures compromise insulation, consider using compression sacks as emergency vapor barriers or additional wind protection layers.
- Adjust daily mileage targets to account for increased energy expenditure from gear issues
- Identify alternative routes avoiding technical terrain when gear fails
- Schedule regular inspection stops to monitor temporary repair durability
- Establish clear communication protocols with group members about equipment limitations
- Prepare contingency exit points and resupply locations based on failure severity
Frequently Asked Questions
Should I Continue Hiking With Damaged Gear or Turn Back Immediately?
You must conduct thorough risk assessment before deciding your continued journey.
Evaluate damage severity against safety protocols. If gear failure compromises structural integrity by more than 30%, turn back immediately.
Minor tears or non-critical component damage allow continuation with emergency repairs.
Weather conditions factor greatly-deteriorating conditions amplify risks exponentially.
Your safety supersedes trip completion.
Emergency repairs work for fabric tears, broken buckles, or pole damage using duct tape and cordage solutions.
How Do I Decide Which Gear Failures Are Too Dangerous to Ignore?
You’ll need systematic gear assessment to identify critical failures.
Evaluate safety equipment first-broken harnesses, damaged ropes, or failed protection systems require immediate attention.
Consider your environment’s severity during risk evaluation.
Alpine conditions amplify consequences of shelter or navigation failures.
Weather protection becomes critical in extreme temperatures.
Communication device failures pose serious risks in remote areas.
If backup solutions aren’t available and environmental conditions worsen risk factors, you must retreat immediately.
Can I Get Insurance Coverage for Expensive Gear That Fails on Trail?
You can obtain gear insurance through specialized travel insurance providers like World Nomads, which offers coverage limits from $1,000-$3,000 depending on your plan.
These replacement policies typically cover theft, loss, and accidental damage during hiking activities.
However, they exclude normal wear-and-tear or mechanical failures from use.
You’ll need purchase receipts for claims and should verify altitude restrictions before buying coverage.
What’s the Best Way to Communicate Gear Emergencies to Family Back Home?
You’ll need reliable gear communication systems for trail emergencies.
Satellite messengers like Garmin InReach Mini provide two-way SMS capability with family members.
Personal Locator Beacons send emergency signals to rescue services but lack family communication features.
Share detailed trip plans and scheduled check-in times before departure.
Prepare critical information beforehand: GPS coordinates, emergency nature, weather conditions, and available supplies for efficient communication.
How Do I Dispose of Broken Gear Responsibly While Hiking?
You’ll need to pack out all broken gear using leak-proof containers or durable bags.
Never burn or bury non-biodegradable equipment on the trail.
Research local regulations before your hike, as protected areas have strict disposal requirements.
Separate hazardous materials like batteries from regular waste.
When you return, use designated recycling options for metal components and electronics.
Trail cleanup maintains wilderness integrity for future hikers.
On a final note
You’ll encounter gear failures on every extended trail adventure. Your ability to execute quick repairs determines whether you continue safely or face potential evacuation. Pack essential repair items: 10 feet of duct tape, needle with heavy-duty thread, and basic tools. Regular maintenance prevents 70% of common equipment breakdowns. When failures occur, assess safety implications immediately. Don’t compromise your well-being for schedule adherence. Proper preparation transforms potential disasters into minor inconveniences you’ll manage confidently.