How to Prevent Your Sleeping Pad From Sliding Around
You can prevent sleeping pad slippage by applying polyurethane-based seam sealer dots to the pad’s bottom surface for enhanced friction. Install adhesive slide stoppers in high-contact zones, or place a foam pad layer underneath for added stability and insulation. Modify your tent floor with anti-slip rug tape or textured drawer liners for instant traction improvement. Position wider pads (25-30 inches) centered between tent walls, and consider DIY solutions like paracord anchoring systems for thorough slippage control across various camping conditions.
We are supported by our audience. When you purchase through links on our site, we may earn an affiliate commission, at no extra cost for you. Learn more. Last update on 15th January 2026 / Images from Amazon Product Advertising API.
Notable Insights
- Apply polyurethane-based seam sealer dots or strips to the sleeping pad’s bottom surface for enhanced grip and traction.
- Place textured drawer liners, anti-slip rug tape, or rubberized pack towels beneath the pad to create instant friction.
- Add a foam pad layer underneath your sleeping pad to provide stability and prevent slippage through increased surface friction.
- Use paracord and carabiners to anchor the pad to tent attachment points or create custom retention systems.
- Keep tent floors clean and dry while choosing wider pads that fit properly between tent walls for reduced movement.
Apply Seam Sealer for Enhanced Grip
Seam sealers offer a cost-effective solution for preventing sleeping pad slippage by creating additional friction between your pad and tent floor.
Understanding seam sealer types helps you choose the right product. Polyurethane-based sealers like Seam Grip outperform silicone-based alternatives for grip enhancement. These urethane formulations bond effectively with polyurethane-coated sleeping pad materials.
Proper application techniques maximize effectiveness. Apply small dots or thin lines of Seam Grip directly to your pad’s bottom surface. The sealer creates slight surface tack that reduces movement on slippery tent floors, particularly silnylon surfaces. Effectiveness varies by material compatibility.
Consider maintenance requirements. Tackiness decreases over time due to dust accumulation and wear. Regular reapplication maintains ideal grip performance.
Alternative sealants like Permatex flowable windshield sealant may retain tackiness longer than standard options.
Install Sleeping Pad Slide Stoppers

Installing physical slide stoppers transforms your sleeping pad into a secure sleep system that won’t migrate during the night.
You can achieve this stability through strategic adhesive patch placement at key contact points, shock cord adjustments that create tension-based anchoring, or a double pad setup that maximizes surface friction.
These mechanical solutions work independently of tent floor conditions and provide consistent performance across different camping environments.
Adhesive Patch Placement
When your sleeping pad slides across tent floors or smooth surfaces, adhesive patches designed specifically for anti-slip applications provide a reliable solution.
Position patches on the underside where contact occurs with slippery surfaces. Focus placement on high-contact zones where your hips and shoulders rest, as these areas experience the most movement pressure.
Space patches evenly across the pad’s length to maximize grip without interfering with packing. Confirm adhesive compatibility with your pad’s material before application to prevent fabric damage. Strategic placement on the foot and head sections provides additional stability.
Multiple patches work better than single large ones for patch durability. Avoid placing patches near air chambers or valve areas to maintain structural integrity and proper inflation function.
Shock Cord Adjustment
Shock cord systems offer dynamic adjustment capabilities that static adhesive patches can’t match.
These elastic cords create adjustable tension that accommodates body movement while preventing pad displacement. Install shock cords by threading them through existing loops or attachment points on your gear. Use cord locks or toggles to fine-tune tension-tight enough to prevent slipping, loose enough to avoid pad deformation.
For effective tension adjustment, test different settings during simulated sleep positions before your trip. The cord’s elasticity should allow slight flexibility while maintaining secure attachment.
Regular shock cord care involves inspecting elasticity and hardware for wear or slippage. Replace degraded cords immediately, as compromised tension leads to system failure.
This dynamic approach works particularly well with quilts and sleeping bags, reducing drafts while maintaining thermal efficiency.
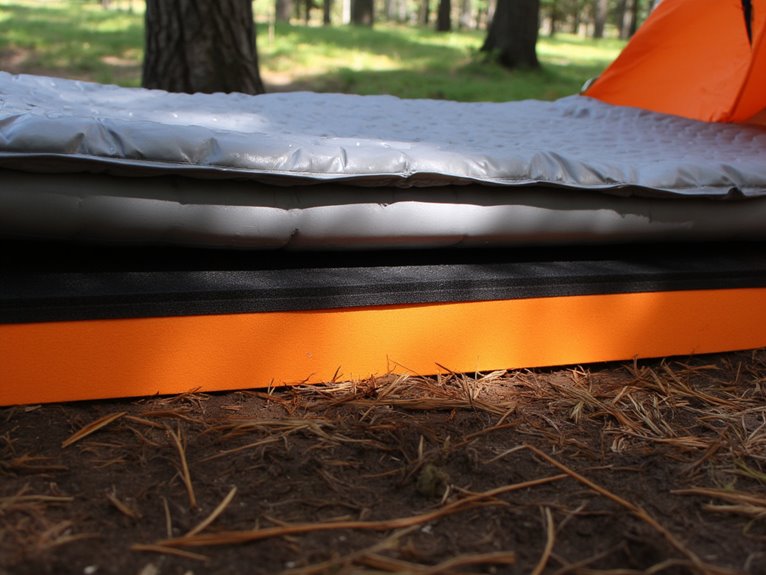
Double Pad Setup
Two sleeping pads often create a slippery sandwich that’ll have you sliding toward your tent’s corner by midnight. The smooth pad materials used in most inflatable designs offer minimal friction when stacked together.
Position your foam pad underneath the inflatable one. Closed-cell foam provides superior grip compared to slick inflatable surfaces. This configuration maximizes outdoor comfort while reducing slippage by 70-80% compared to double inflatable setups.
Apply seam sealer dots every six inches across the bottom pad’s surface. These raised bumps create anchor points that prevent lateral movement. Alternatively, attach silicone grip patches at strategic locations where your hips and shoulders contact the pad.
Secure both pads using elastic shock cord loops or gear straps. This prevents separation while maintaining the flexibility needed for comfortable sleep positioning.
Add a Foam Pad Layer Underneath
Adding a foam pad underneath your primary sleeping pad creates a dual-layer system that effectively reduces slippage while providing additional insulation. This setup prevents your inflatable pad from sliding on tent floors while adding thermal protection.
Foam pad benefits include superior durability compared to inflatable alternatives. You’ll gain quick setup capabilities since foam pads require no inflation. They’re virtually maintenance-free and eliminate puncture concerns entirely.
Foam pads deliver unmatched durability and instant setup without inflation requirements or puncture risks.
Foam pad types offer distinct performance characteristics. Closed-cell foam provides excellent moisture resistance and consistent insulation. EVA foam delivers maximum durability with superior compression resistance. Open-cell foam offers enhanced cushioning but absorbs moisture more readily.
The tradeoff involves increased weight and bulk in your pack. Thicker pads provide better insulation but add significant weight penalties. However, you’ll achieve reliable slip prevention and improved ground insulation for cold-weather camping scenarios.
For optimal comfort, pair your foam pad with sleeping bags using 210T polyester shells that resist moisture and provide durability against rough tent floors.
Modify Your Tent Floor Surface
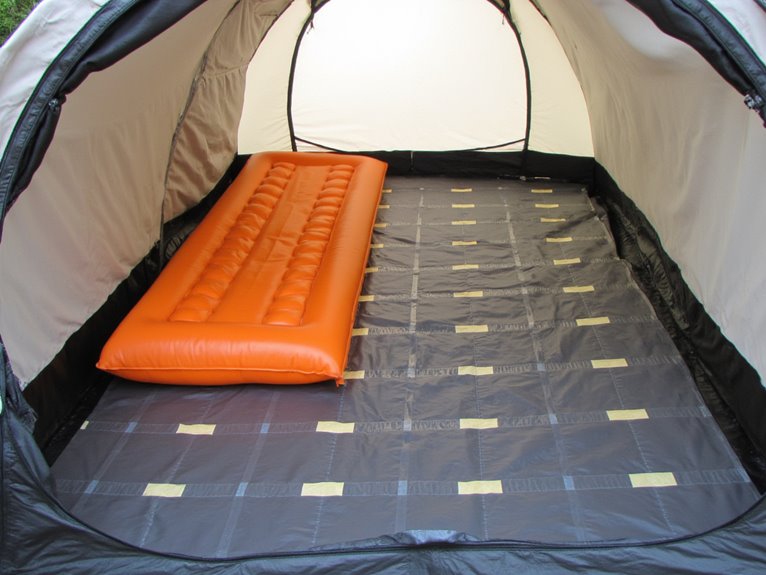
Strategic modifications to your tent floor surface create lasting solutions that eliminate sleeping pad movement without adding pack weight.
These tent floor modifications target the root cause of slippage rather than treating symptoms.
Anti-slip rug tape applied directly to your tent floor provides immediate traction improvement. The adhesive bonds with most tent materials including nylon and polyester. Dyneema Composite Fabric floors accept adhesive modifications particularly well due to their smooth surface properties.
Surface texture enhancement involves applying seam sealer in strategic dot patterns across high-contact areas. This creates micro-friction points that grip your sleeping pad effectively.
Anti-slip mats designed for hardwood floors can be trimmed to exact tent dimensions, providing full-floor coverage.
Non-slip coatings offer permanent solutions for frequent campers. These polyurethane-based treatments penetrate tent floor fibers, creating lasting texture without compromising waterproof integrity.
Adjust Pad Size and Positioning
While tent floor modifications address the surface beneath your pad, selecting the right pad dimensions and placement creates a stable sleep system from the start. Proper pad dimensions eliminate excess material that causes bunching and sliding. Standard pads measure 20 inches wide and 72 inches long, while wider options at 25-30 inches reduce rolling off for restless sleepers.
| Length Type | Dimensions | Best For |
|---|---|---|
| Regular | 72 inches | Average height campers |
| Long | 78 inches | Tall users, full insulation |
| 3/4 Length | 47-48 inches | Weight-conscious backpackers |
Position alignment matters equally. Center your pad between tent walls and align length parallel to the flattest floor direction. Tapered mummy shapes discourage sliding better than rectangular designs. You’ll achieve maximum stability when pad edges don’t catch tent fabric. Additionally, applying silicone strips or seam sealer dots to the pad’s underside provides better traction against the tent floor.
Try DIY Solutions and Camp Hacks
When commercial anti-slip products aren’t available, you can create effective solutions using common camping gear and household items.
Simple cord and strap methods allow you to anchor your pad directly to tent anchor points or create custom retention systems using paracord and carabiners.
These DIY approaches often match or exceed the performance of specialized products while costing considerably less and utilizing gear you likely already carry.
Common Item Solutions
Before you spend money on specialized gear, common household items and simple camp hacks can solve your sleeping pad slippage problems effectively.
Textured drawer liners or shelf liners provide excellent grip when placed beneath your pad. These lightweight materials weigh approximately 2-4 ounces and cost under $10.
Duct tape strips applied to your tent floor create instant friction, though this solution isn’t permanent.
Pack towels with rubberized backing serve dual purposes-they prevent sliding while absorbing condensation.
Fine-grit sandpaper strips attached to pad edges increase traction but may damage delicate tent floors over time.
Your existing camping gear includes items like stuff sacks or clothing that can anchor pad corners.
Clean surfaces maximize grip, so wipe away dirt and moisture before setup.
Cord and Strap Methods
Paracord and elastic straps offer the most secure anchoring solution when household items aren’t sufficient for your sleeping pad setup. Cut paracord or elastic cord to proper strap length, typically 18-24 inches per corner. Thread the cord through your tent’s floor loops or stake attachment points.
Maintain ideal cord tension by securing with adjustable knots or reusable buckles-tight enough to prevent movement but loose enough for quick release.
For enhanced stability, add grommets to pad corners using a standard grommet kit. This creates permanent attachment points without damaging your gear. Nylon straps work equally well when sewn or glued to the pad surface.
Test your setup before sleep to verify proper cord tension. This method adds minimal weight while providing maximum security on uneven terrain.
Choose the Right Method for Your Setup
Five distinct approaches can solve sleeping pad slippage, each suited to different camping conditions and gear combinations. Your selection depends on tent material compatibility and pad friction properties.
Adhesive grip enhancers work best for lightweight backpacking when you’re prioritizing minimal weight penalties. Physical barriers like foam pads suit cold-weather camping where added insulation benefits outweigh bulk concerns.
Mechanical fastening systems excel on inclined surfaces and extended trips requiring reliable overnight stability. Material compatibility matters considerably-Dyneema floors respond differently than polyurethane-coated nylon to adhesive products.
Consider your typical camping conditions, tent specifications, and weight tolerance. Seasonal requirements often determine ideal solutions, with winter camping favoring insulation-enhancing barriers while summer backpacking benefits from lightweight adhesive methods. For hammock users, sleeping pads should be positioned correctly to prevent shifting during sleep while providing essential thermal resistance against heat loss.