Site Selection Tips for Warmth and Shelter From Wind/Condensation
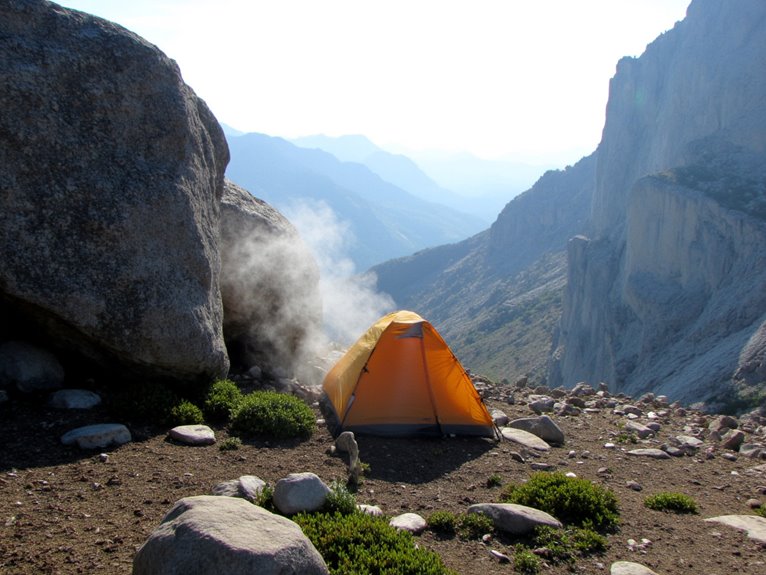
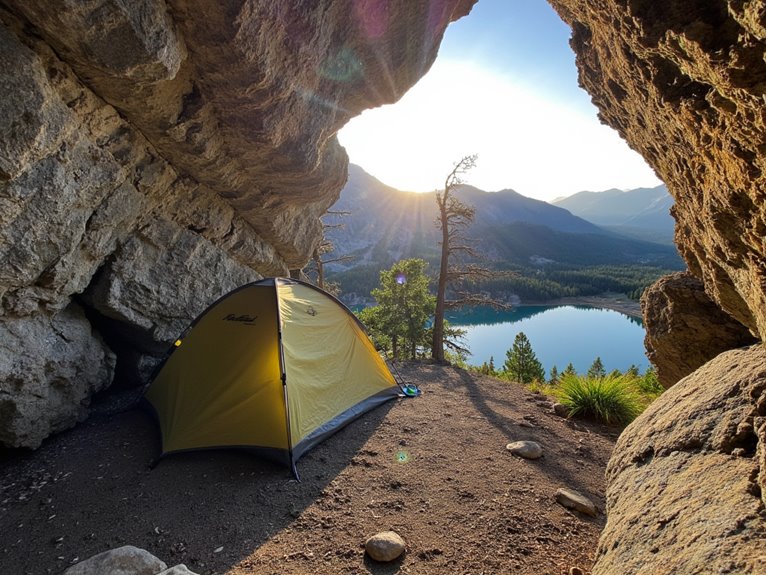
Position your shelter 3/4 up slopes on stable, well-drained ground to avoid flooding while gaining natural wind protection. Choose sites 5-10 times a windbreak’s height downwind from dense evergreens or rock formations for ideal wind deflection. Face openings southeast in northern climates to capture morning sun while avoiding harsh northwest winds. Elevate your shelter on gravel or crushed rock to prevent moisture wicking, and maintain tight guy-lines creating ventilation gaps between rainfly and tent body. These foundational principles release advanced techniques for maximizing thermal efficiency.
We are supported by our audience. When you purchase through links on our site, we may earn an affiliate commission, at no extra cost for you. Learn more. Last update on 20th January 2026 / Images from Amazon Product Advertising API.
Notable Insights
- Position shelter 3/4 up slopes on leeward side of hills for natural wind protection and drainage.
- Face shelter openings southeast in northern climates to capture morning sun while avoiding northwest winds.
- Place shelter 5-10 times the windbreak height downwind from dense evergreen trees for optimal protection.
- Choose elevated sites with gravel or crushed rock foundation to prevent moisture rise and condensation.
- Use sloped roofs at 30-45 degree angles to deflect wind and shed precipitation effectively.
Choosing the Right Terrain and Elevation
When selecting a shelter site, terrain and elevation decisions directly impact your survival and comfort in harsh conditions.
Terrain Assessment requires avoiding low-lying areas prone to flooding and mudslides. You’ll want stable ground that won’t shift during storms or temperature changes.
Elevation Importance becomes clear when you position your shelter about 3/4 up slopes. This placement avoids flood risks below while escaping harsh winds at ridge tops. Cold air sinks into valleys, making lower elevations considerably colder during night hours. Higher ground provides better drainage and visibility for potential rescue operations.
Avoid avalanche-prone zones in mountainous terrain. Seek natural wind protection on leeward sides of hills. Balance accessibility with safety when choosing your final location.
Natural Windbreaks and Shelter Positioning
When you’re selecting a campsite, proper windbreak identification and shelter positioning can mean the difference between a comfortable night and a miserable experience fighting gusts that steal your body heat.
You’ll need to assess natural terrain features like dense tree lines, rock formations, and topographical depressions that can deflect prevailing winds away from your sleeping area.
Your shelter’s orientation relative to these natural barriers determines how effectively you’ll maintain warmth throughout the night.
Identifying Natural Wind Barriers
Although artificial windbreaks provide reliable protection, natural barriers often deliver superior long-term performance with minimal maintenance requirements. You’ll find evergreen effectiveness peaks with species like arborvitae, spruce, and pine that maintain year-round protection. These trees create consistent wind reduction zones extending 10-20 times their height downwind.
Plant diversity strengthens barrier resilience by reducing disease susceptibility while supporting local ecosystems. Curved or staggered plantings disrupt wind flow more effectively than straight-line configurations.
| Barrier Type | Wind Reduction | Maintenance Level | Longevity | Cost |
|---|---|---|---|---|
| Evergreen Trees | 75-85% | Low | 50+ years | Medium |
| Native Grasses | 45-60% | Very Low | 20+ years | Low |
| Mixed Shrubs | 60-75% | Medium | 25+ years | Medium |
| Deciduous Trees | 40-80% | Low | 40+ years | Medium |
| Coastal Dunes | 80-90% | None | Permanent | None |
Consider existing topography when selecting natural windbreaks to maximize protection efficiency.
Optimal Shelter Orientation Strategies
Strategic shelter positioning transforms natural windbreaks into powerful protection systems that can reduce wind speeds by 60-90% within ideal zones.
Position your shelter 5-10 times the windbreak’s height downwind for maximum effectiveness. This creates a protected pocket where wind velocity drops considerably.
Orient shelter openings perpendicular to prevailing winds. In northern climates, face openings southeast to capture morning sun while avoiding harsh northwest winds.
Effective shelter design incorporates sloped roofs at 30-45 degree angles to deflect wind and shed precipitation.
Select elevated sites with natural drainage to prevent moisture accumulation.
Avoid valley floors where cold air pools and condensation forms.
Install proper ventilation systems near the roof peak and base to create airflow that removes interior moisture while maintaining warmth.
Terrain Features for Protection
Natural terrain features serve as your first line of defense against wind and weather, providing protection that no artificial shelter can match. You’ll need to identify suitable natural formations like rock walls, ridgelines, and dense forest canopies that deflect prevailing winds.
Position your shelter strategically behind these barriers. Dense trees reduce wind speed by up to 50% within their leeward zone. Rock formations create turbulence that dissipates wind energy effectively.
| Feature Type | Protection Level | Best Use |
|---|---|---|
| Dense Forest | High (60-80% reduction) | Primary windbreak |
| Rock Cliffs | Very High (70-90% reduction) | Storm shelter |
| Hill Depressions | Moderate (40-60% reduction) | Base camp |
| Thick Shrubs | Low-Moderate (30-50% reduction) | Secondary barrier |
| Natural Caves | Maximum (95-100% reduction) | Emergency shelter |
Sheltering vegetation like evergreen groves maintains year-round protection, while deciduous stands offer seasonal coverage.
Preventing and Managing Moisture Issues

When moisture infiltrates your shelter system, it compromises insulation performance and creates conditions that can lead to hypothermia in cold weather environments.
Effective moisture reduction requires strategic site selection and proactive condensation management techniques. Choose elevated, well-drained locations away from water bodies and dense vegetation. Avoid low-lying areas where cold air settles and moisture accumulates.
Position your shelter on gravel or crushed rock substrates that prevent capillary moisture rise.
Essential ventilation strategies include:
- Maximize airflow by opening all vents and windows except during precipitation.
- Orient entrances toward prevailing breezes for enhanced air circulation.
- Maintain tight guy-lines to create ideal gaps between rainfly and tent body.
- Establish cross-ventilation using opposing vents to replace humid interior air.
Remove wet gear from your shelter immediately.
Regularly wipe condensation from walls and use breathable fabrics with double-wall construction for efficient vapor management.
Essential Resource Proximity Planning

You must position your shelter within 60 yards of a reliable water source to minimize daily energy expenditure while maintaining access to this critical survival resource.
Your site selection should prioritize areas with abundant deadfall and standing timber for fuel and construction materials, as wood serves dual purposes in both heating and structural applications.
Plan your shelter location with clear evacuation routes in mind, ensuring you can quickly move to higher ground or alternative positions if flooding, wildlife encounters, or other hazards threaten your safety.
Water Source Accessibility
Access to clean water determines your survival timeline more than any other single factor in wilderness shelter selection. Position your shelter within 200 yards of flowing water sources like streams or springs. Flowing water contains fewer bacteria than stagnant pools.
Always plan for water purification through boiling, filtering, or chemical treatment regardless of source clarity.
Consider seasonal availability when selecting sites. Springs and permanent streams provide year-round access, while seasonal creeks may disappear during dry periods.
Evaluate these factors systematically:
- Distance from source – Maximum 300 yards for daily collection
- Water flow consistency – Flowing beats stagnant water
- Terrain accessibility – Safe path to water source
- Contamination risks – Upstream pollution or animal waste
Dig collection wells in valley bottoms if surface water isn’t available. Position shelters on elevated ground above flood zones.
Wood Supply Management
Secure your wood supply before finalizing any shelter location, as this single resource determines both your structural capabilities and thermal survival.
You’ll need dead and downed timber within 100 yards of your shelter site to minimize energy expenditure during collection.
Wood quantity estimation requires calculating three days’ worth of fuel minimum-approximately 50-75 pounds of mixed hardwood for continuous fire maintenance.
Focus your assessment on available deadfall rather than living trees to preserve forest integrity.
Effective firewood collection techniques prioritize ground-level sources first. Target seasoned branches measuring 1-4 inches in diameter for ideal burning characteristics.
Green wood serves structural purposes but burns inefficiently as fuel.
Plan multiple collection routes from your shelter location.
Stockpile materials before weather deteriorates, maintaining separate piles for construction versus combustion needs.
Emergency Evacuation Routes
When selecting your shelter location, evacuation route planning must integrate directly with resource proximity assessments to verify rapid egress during emergencies. Your site must provide multiple exit paths within 100 meters of your primary shelter position.
Pre-load GPS coordinates for primary and secondary evacuation routes before establishing camp. This evacuation readiness protocol verifies immediate access to navigation data when visibility drops or terrain becomes unfamiliar.
Emergency signaling capabilities require direct sightlines to potential rescue corridors.
Essential evacuation planning components include:
- Primary route identification – Main path to nearest road or safety zone
- Alternative pathway mapping – Secondary exit avoiding primary route obstacles
- Communication checkpoint locations – Predetermined signal transmission points
- Resource cache positioning – Emergency supply access along evacuation corridors
Maintain 50-meter clearance zones around evacuation paths to prevent debris blockage during adverse weather conditions.
Weather Protection Strategies
Although natural disasters and extreme weather events can strike without warning, strategic site selection forms your first line of defense against harsh environmental conditions.
Your climate resilience depends on choosing locations with natural geological features like caves or rock formations that provide inherent protection. Avoid low-lying areas near water bodies to prevent flooding and standing water accumulation.
Select shelter materials with high thermal resistance values-R-15 or greater for walls in cold climates.
Dense vegetation acts as natural windbreaks, reducing wind speeds by up to 50%. Elevated sites offer superior protection from storm surges and flooding.
Use predictive climate models to anticipate local weather patterns and inform your decision-making process. Proper site selection reduces structural loads and minimizes maintenance requirements.
Safety and Wildlife Avoidance Measures
Since wildlife encounters pose significant risks to personal safety and equipment security, understanding animal behavior patterns becomes essential for successful site selection and outdoor activities.
Study local fauna before entering unfamiliar territory. Learn to identify tracks and recognize activity patterns, particularly dawn and dusk movements for bears and other predators.
Knowledge of local wildlife behavior and tracking signs is your first line of defense in unfamiliar territory.
Effective wildlife safety requires maintaining proper distances and using deterrent strategies. Stay alert to environmental cues indicating animal presence through sight, hearing, and smell detection methods.
Essential safety protocols include:
- Maintain 100-yard distance from bears and wolves, 25 yards from other large animals
- Make noise while hiking to prevent startling wildlife unexpectedly
- Carry bear spray in high-risk areas as primary deterrent
- Store food properly using bear-proof containers or hanging systems
Choose campsites away from known wildlife corridors and feeding areas for best protection.


