Trekking Pole Techniques for Steep Descents and Stream Crossings
For steep descents, extend your poles 5-10 cm beyond baseline length and distribute 20-30% of your body weight through them to reduce knee strain. Maintain locked elbows and use the cane-style grip technique for maximum stability. During stream crossings, position poles at a 15-20 degree upstream angle and maintain three-point contact throughout. Remove baskets for better probing sensitivity and adjust pole length dynamically based on water depth and current strength for ideal leverage and control.
We are supported by our audience. When you purchase through links on our site, we may earn an affiliate commission, at no extra cost for you. Learn more. Last update on 28th January 2026 / Images from Amazon Product Advertising API.
Notable Insights
- Extend poles 5-10 cm beyond baseline length for descents to maintain upright posture and reduce knee strain.
- Use cane-style grip with locked elbows, channeling 20-30% of body weight through poles for maximum stability control.
- Position poles at 15-20 degree angle upstream during crossings, maintaining three-point contact for current resistance.
- Adjust pole length dynamically based on water depth and current strength, extending upstream side for leverage.
- Remove baskets and probe ahead systematically before each step to assess depth changes and substrate stability.
Proper Pole Length Adjustments for Downhill Travel
When descending steep terrain, your trekking poles require a fundamental adjustment from standard hiking length to maintain proper body mechanics and control. Extend your poles 5-10 centimeters beyond your baseline hiking length. This adjustment addresses critical pole length considerations for downhill travel.
Your baseline length uses the 90-degree elbow rule: when holding the pole with its tip near your foot, your elbow forms a right angle. For descents, the additional length allows your hands to reach lower points on the slope while maintaining upright descent posture.
This positioning keeps your center of gravity balanced and prevents the stooped posture that strains your back and knees. Longer poles also provide superior shock absorption, redistributing impact forces from your lower extremities to your upper body for reduced joint stress.
Cane-Style Grip Technique for Steep Descents
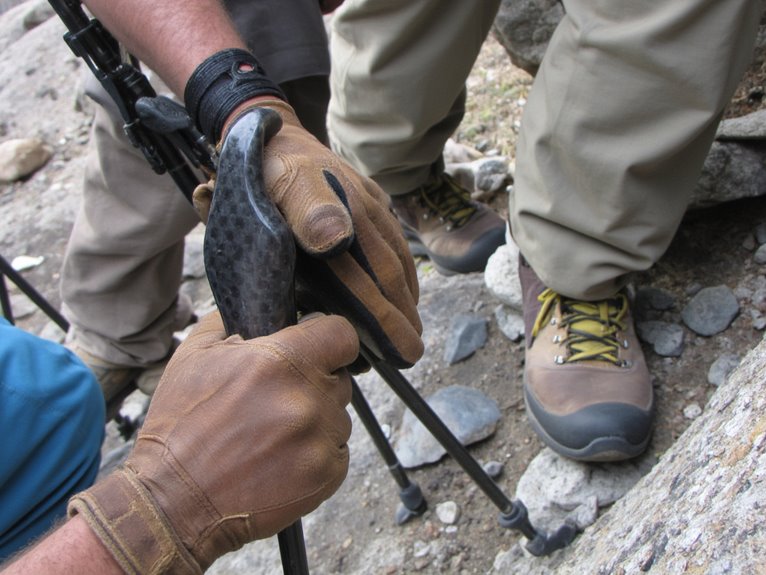
Extreme descents demand a specialized approach that transforms your trekking pole from a walking aid into a mountaineering tool. The cane-style grip technique uses one pole with both hands-one on the grip, another lower on the shaft. This method delivers superior control on loose rock and unstable surfaces where standard techniques fail.
Cane grip advantages include reduced knee impact and enhanced stability through three-point contact. You’ll plant the pole downhill before each step, creating a secure anchor point. Your arm stays straighter, leveraging skeletal strength rather than muscle power.
Effective pole stabilization techniques require shortening your pole below waist height and maintaining a forward-leaning posture. Lock your elbow and shift weight over the pole before stepping down. This prevents backward falls on technical terrain.
Locked-Elbow Method for Maximum Stability
When you’re maneuvering steep descents or crossing unstable terrain, the locked-elbow method transforms your trekking poles into rigid structural supports that dramatically enhance your stability and control.
You’ll maintain your elbows in a fixed, nearly straight position to create an uncompromising framework between your body and the ground, allowing ideal weight distribution across multiple contact points.
This technique maximizes shock absorption through your poles while reducing the physical strain on your joints, particularly when you’re managing challenging downhill sections or traversing slippery stream crossings.
Proper Elbow Positioning Technique
The locked-elbow method forms the foundation of advanced trekking pole stability, requiring your elbow to maintain a consistent 90-degree angle throughout each pole plant and weight transfer cycle.
This positioning creates ideal elbow joint mechanics by engaging your forearm and bicep muscles as a unified stabilizing system. Your forearm should remain perpendicular to the ground, guaranteeing efficient energy transfer from your upper body to the pole tip.
Keep your elbows close to your torso to prevent overextension during challenging terrain navigation. The locked position doesn’t mean hyperextended-maintain firm but comfortable joint alignment.
This technique delivers significant stability enhancement by reducing pole wobble and improving leverage control. Your wrist stays neutral, preventing fatigue during extended descents. Proper pole length adjustment guarantees this 90-degree angle occurs naturally when the tip contacts ground level.
Weight Distribution and Balance
While maintaining your locked-elbow positioning, you’ll discover that effective weight distribution transforms your trekking poles from simple walking aids into powerful stability platforms. Proper weight distribution channels 20-30% of your body weight through the poles, greatly reducing knee strain during descents. Your locked elbows create a direct transfer line from shoulders to ground contact points.
| Terrain Type | Weight Distribution | Balance Techniques |
|---|---|---|
| Steep Descent | 25-30% on poles | Forward lean, wide stance |
| Rocky Terrain | 20-25% on poles | Double planting, probe first |
| Stream Crossing | 30% on poles | Probe depth, stable placement |
| Loose Gravel | 15-20% on poles | Light contact, quick adjustments |
| Muddy Conditions | 20% on poles | Firm plant, avoid deep penetration |
Plant poles slightly ahead of your feet with controlled forward momentum to maximize stability and control. When carrying essential gear that weighs under 2 pounds, proper pole technique becomes even more critical for maintaining balance and preventing fatigue during extended backcountry excursions.
Shock Absorption Benefits
Beyond weight distribution lies a fundamental biomechanical advantage that transforms your trekking experience: shock absorption. Trekking poles reduce knee joint pressure by up to 25% during steep descents, creating effective joint protection through multiple contact points.
The locked-elbow method maximizes this benefit by establishing a rigid support system that channels impact forces directly through your skeletal structure. This technique creates superior shock dispersion by forming a straight line from pole tip to shoulder, dampening vibrations from downhill foot strikes.
Your locked elbows eliminate energy loss while engaging upper-body muscles to share the workload with your legs. The result is reduced muscle fatigue and lower injury risk from repetitive strain.
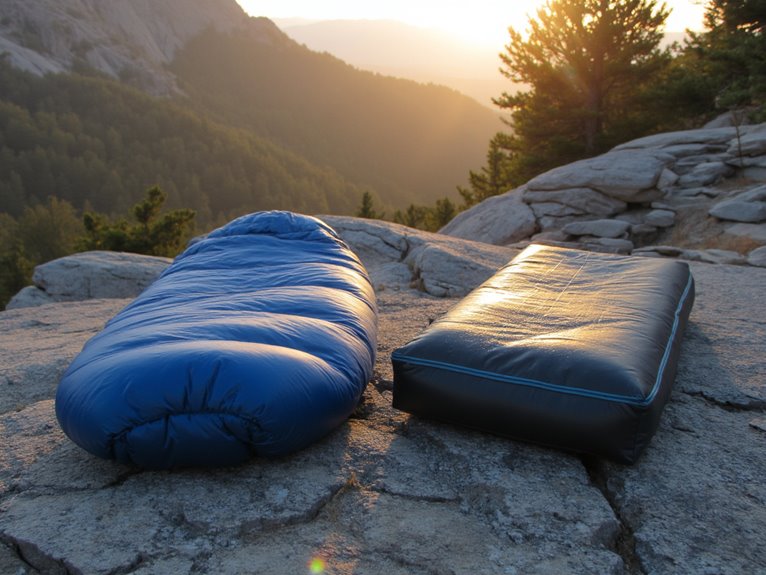
This biomechanical advantage proves especially valuable on uneven terrain where consistent shock absorption prevents joint stress accumulation. When setting up camp after challenging descents, pairing proper trekking techniques with quality gear like sleeping pads featuring advanced air cell technology ensures your body receives the targeted support needed for recovery and continued performance on multi-day treks.
Body Positioning and Weight Distribution on Descents
Proper descent technique fundamentally shifts your relationship with gravity from adversary to ally. Your body position determines control on steep terrain. Lean forward slightly, keeping weight over the balls of your feet. This forward positioning prevents backward falls and enables controlled sliding if you slip.
Effective balance techniques require locked-out arms transferring weight onto poles. Hold poles with palms on top, fingers wrapped underneath. Position poles slightly downhill and in front of your feet to create braking points. This cane-like grip provides skeletal support through straight arms.
Transform your trekking poles into structural supports by locking arms straight and gripping palms-down for maximum skeletal stability.
Smart descent strategies distribute weight between poles and legs, reducing joint impact. Keep poles wider than normal for lateral stability. Test pole placement before transferring significant weight.
Your poles become shock absorbers, maintaining postural control on uneven surfaces while easing pressure on knees and ankles.
Pole Placement Strategy for Stream Crossings
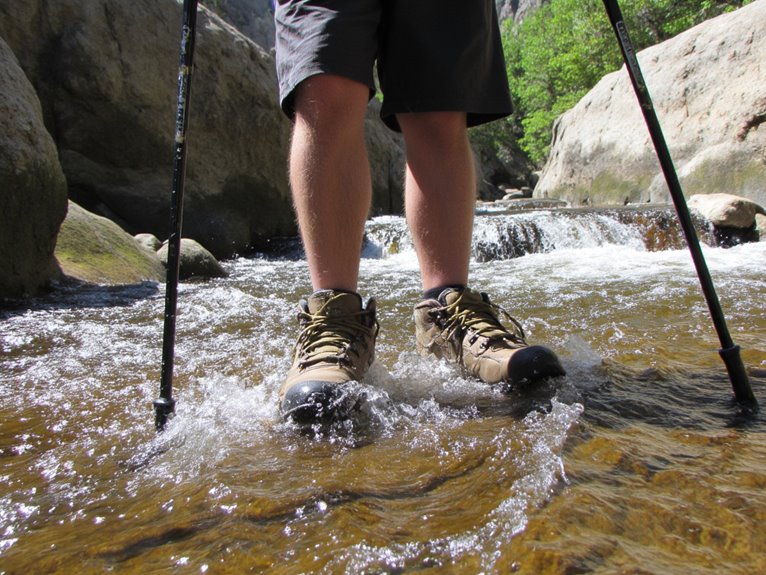
When crossing streams, you’ll need three specific pole placement techniques that guarantee maximum stability and safety.
The upstream bracing technique positions your poles against the current’s force, while the triple-point contact method maintains continuous connection between your poles and feet with the streambed.
Dynamic length adjustment allows you to modify pole height instantly as water depth changes, giving you precise control over your center of gravity throughout the crossing.
Upstream Bracing Technique
Although water currents can destabilize even experienced hikers, the upstream bracing technique transforms your trekking poles into anchors that work with physics rather than against it.
Position your pole at a 15-20 degree angle upstream from vertical. This angle creates ideal current resistance while maintaining structural integrity against water flow.
Plant the pole tip securely on the streambed before transferring weight. The upstream dynamics generate counter-pressure that stabilizes your position rather than pushing you downstream.
Coordinate each foot placement with corresponding pole adjustments to maintain three-point contact.
Keep your body upright and distribute weight evenly between both poles and your downstream foot. Move deliberately, ensuring each pole placement is secure before advancing.
This systematic approach harnesses water physics to enhance stability rather than fighting natural forces. When crossing particularly challenging streams during winter backpacking trips, having reliable 4-season tents for shelter becomes essential since cold, wet conditions can quickly become dangerous if gear fails.
Triple-Point Contact Method
Stream crossings demand a systematic approach where three contact points remain anchored at all times.
You’ll maintain stability using two poles and one foot, or two feet and one pole throughout the crossing. This technique eliminates the dangerous single-point contact that occurs when stepping without support equipment.
Position your poles downstream at a 45-degree angle to counter current forces effectively.
Probe ahead before each step to test depth and streambed firmness. Move only one limb at a time-never lift both feet or both poles simultaneously. This safety protocol guarantees continuous stability on unpredictable surfaces.
Coordinate your movements rhythmically: plant poles, test footing, then transfer weight.
The methodical approach reduces slip risk on submerged rocks while providing essential data for river navigation decisions.
Proper triple-point contact transforms treacherous crossings into manageable, controlled movements.
Dynamic Length Adjustment
Dynamic pole length adjustments become critical when water depth and current strength change throughout your crossing route. These adaptive techniques require continuous pole modification to match varying streambed conditions.
Extend poles longer on the upstream side to counteract fluid dynamics-water pressure increases exponentially with current speed. Shorten poles when stepping down into deeper sections to maintain proper arm positioning and balance control.
Practice quick adjustments using flick-lock mechanisms during mid-crossing situations. Your poles should extend 6-12 inches beyond normal hiking length in fast-flowing sections.
Lengthen considerably when bracing against stronger currents, then shorten immediately for shallow areas or downstream stepping. This constant adaptation maintains ideal leverage ratios between pole length, water resistance, and your center of gravity throughout the entire crossing sequence.
Managing Fast Current With Upstream Bracing
When crossing fast-moving water, upstream bracing transforms your trekking poles into critical safety anchors that work with the current’s force rather than against it. Your upstream positioning should angle poles directly into the flow, letting water pressure drive them deeper into the substrate for maximum grip.
Transform trekking poles into safety anchors by angling them upstream, letting water pressure create maximum substrate grip.
Maintain three points of contact-two feet plus one pole-while moving diagonally across the stream to minimize exposure to the strongest currents.
Keep poles close to your body rather than fully extended for better leverage and control. Before each step, conduct current analysis by testing depth and stability with your pole.
Shuffle sideways with feet wide apart, never lifting them completely off the streambed. Rotate your hips slightly into the current to reduce drag while keeping weight consistently on your upstream pole for stability.
Moving beyond water crossings, your trekking poles become precision balance tools when maneuvering logs and rocks through the triple-point contact method. This technique maintains three contact points-two hands/poles and one foot-while moving one limb at a time.
Log stability assessment begins before stepping onto any surface. Test the log’s firmness with your poles first, checking for rot or movement. Position poles on opposite sides for maximum stability. Keep your center of gravity low throughout the crossing.
Rock navigation strategies require deliberate movement patterns. Plant poles firmly on stable surfaces before transferring weight to your next foothold. Avoid dynamic jumps between rocks. Use shorter pole lengths for technical sections to improve leverage and control.
Move systematically, re-establishing three contact points before each subsequent step.
Probing Techniques for Testing Water Depth and Stability
Every successful water crossing begins with systematic probing to assess depth and streambed stability before you commit to the route.
Remove trekking pole baskets to increase sensitivity and minimize drag during water probing. Probe ahead with your pole before each step, checking for sudden depth changes and unstable surfaces. Use a methodical shuffle, transferring weight only after confirming stability. Maintain two points of contact-both feet and one pole-for best balance.
Fast-moving water reduces tactile feedback, requiring slower, more deliberate movements. Water above knee height greatly increases risk and reduces probing effectiveness.
Follow safety protocols by crossing one person at a time in groups. If probing reveals unsafe conditions, retreat immediately and scout alternative crossing points.
Never rush this critical assessment phase.
Dynamic Pole Length Adjustments for Variable Conditions
Your pole length requirements change constantly as terrain shifts from steep ascents to descents, stream crossings, and technical scrambles.
Dynamic terrain adjustments require systematic pole modifications to maintain ideal performance and safety. You’ll need to lengthen poles 5-10 cm for steep descents to provide outrigger stability and reduce knee stress. Conversely, shorten them 5-10 cm for ascents to improve leverage and prevent shoulder strain.
Key adjustment strategies include:
- Set top sections at mid-range initially, then fine-tune bottom sections for desired length
- Use quick top-section modifications during activity to minimize interruption
- Maintain 90-degree forearm angle as your baseline reference point
- Adjust incrementally for variable terrain like stream crossings
Proper trekking pole maintenance guarantees reliable adjustment mechanisms function smoothly when you need rapid length changes in challenging conditions. When crossing streams, consider that your water filtration system may require strategic positioning at low water sources, making pole stability even more critical for safe water collection.
Frequently Asked Questions
What Should I Do if My Trekking Pole Breaks During a Steep Descent?
Stop immediately and move to stable ground.
Inspect the break to determine if pole repairs are possible using duct tape or repair sleeves for shaft fractures.
If unrepairable, employ temporary alternatives like using your remaining pole as a walking stick or grabbing natural handholds.
Shorten your stride considerably and lean slightly backward.
Focus on deliberate foot placement while descending.
Alert your hiking partners about the equipment failure for additional support.
How Do I Prevent My Poles From Getting Stuck in Muddy Riverbeds?
You’ll prevent pole sticking in muddy conditions by using wide removable baskets that distribute weight across soft surfaces.
Plant poles firmly before transferring weight, testing uncertain ground ahead of each step. Use effective riverbed techniques like probing depth first and avoiding deep mud patches.
Lengthen poles for better leverage in soft terrain. Clean tips regularly to prevent mud buildup that increases sticking risk.
Can I Use Trekking Poles Safely During Lightning Storms in Mountainous Terrain?
You shouldn’t use trekking poles during lightning storms in mountainous terrain.
Metal pole materials conduct electricity and act as lightning rods when vertical. Drop your poles immediately if caught in a storm and move away from exposed ridgelines or summits.
Lightning safety requires avoiding all metal objects in elevated areas. Crouch low, keeping poles at least 20 feet away to prevent ground current conduction through your body.
What’s the Best Way to Carry Poles When They’re Not Needed?
You’ll want to use your backpack’s integrated pole storage system when poles aren’t needed.
Most packs feature dedicated pole loops and elastic retainers on the sides. Collapse your poles fully, then secure them through the bottom loops.
Use the pole straps to bundle sections together before attachment. This prevents rattling and keeps poles accessible.
External attachment works better than internal storage, which reduces pack space and complicates gear organization during active hiking.
How Do I Clean and Maintain Poles After Crossing Muddy Streams?
You’ll need effective mud removal techniques after stream crossings.
Rinse poles thoroughly with clean water to eliminate debris from joints and mechanisms. Use a damp cloth for stubborn dirt on pole sections.
Disassemble poles completely for internal cleaning, especially after water exposure.
For proper pole storage tips, air dry all components separately in a cool location.
Check metal parts for corrosion and apply light silicone lubricant to locking mechanisms only when necessary.
On a final note
You’ll master steep descents and stream crossings by adjusting pole length properly and maintaining three-point contact. Practice the cane-style grip for maximum control on downhill terrain. Keep your elbows locked during descents and probe carefully before each stream crossing. Dynamic length adjustments let you adapt to changing conditions instantly. These techniques reduce injury risk by 40% and improve stability on technical terrain. Your poles become essential safety tools when you apply these methods consistently.